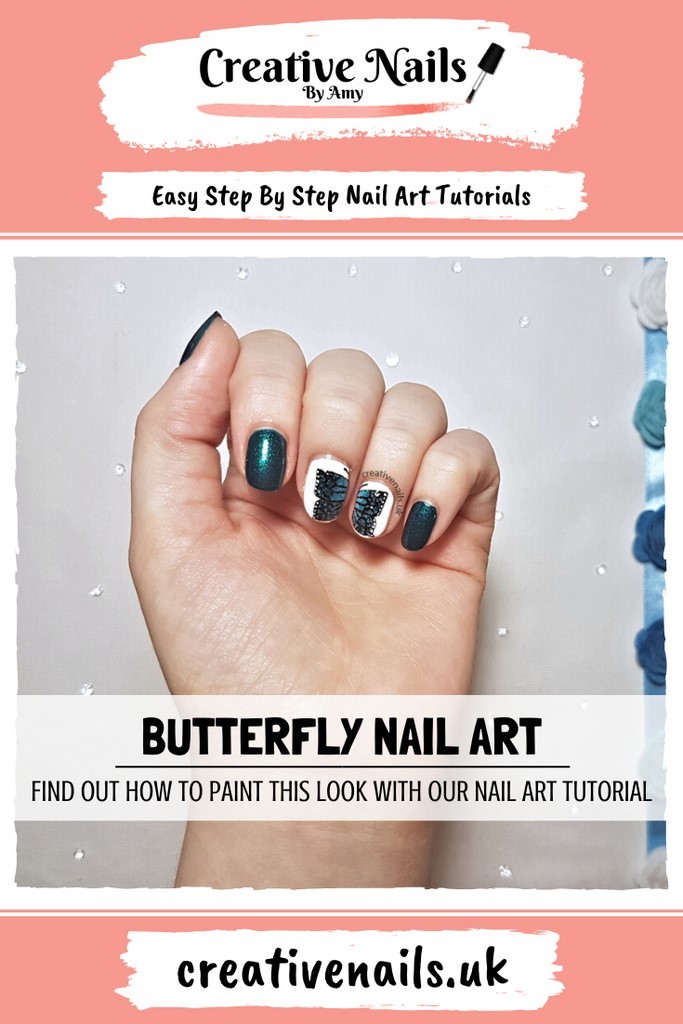
Butterfly | Nail Art Tutorial
Would you like this design painted on false nails for you?
If you can’t find this design with our other false nail sets in our shop, please contact me and I will happily sort it out for you!
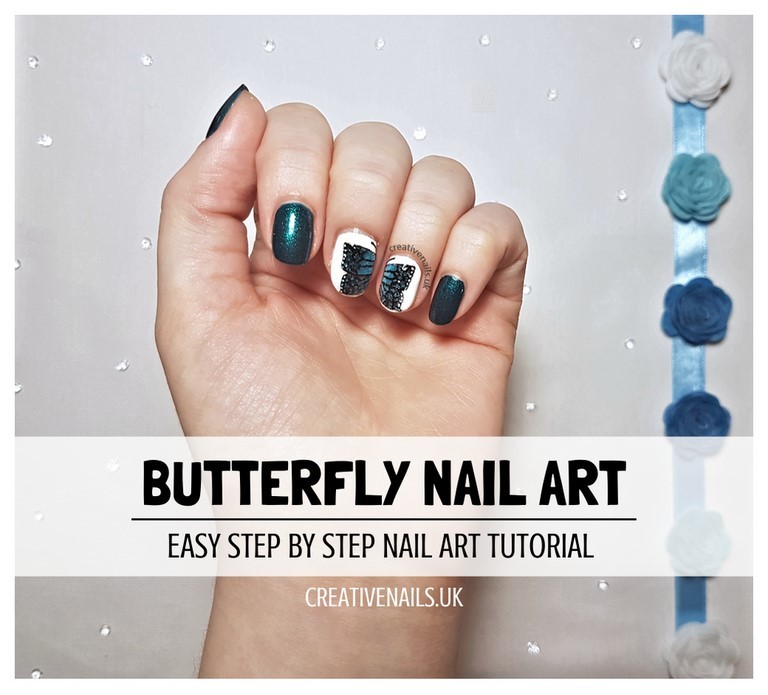
Now lets show you how we created this butterfly nail art!
step 1
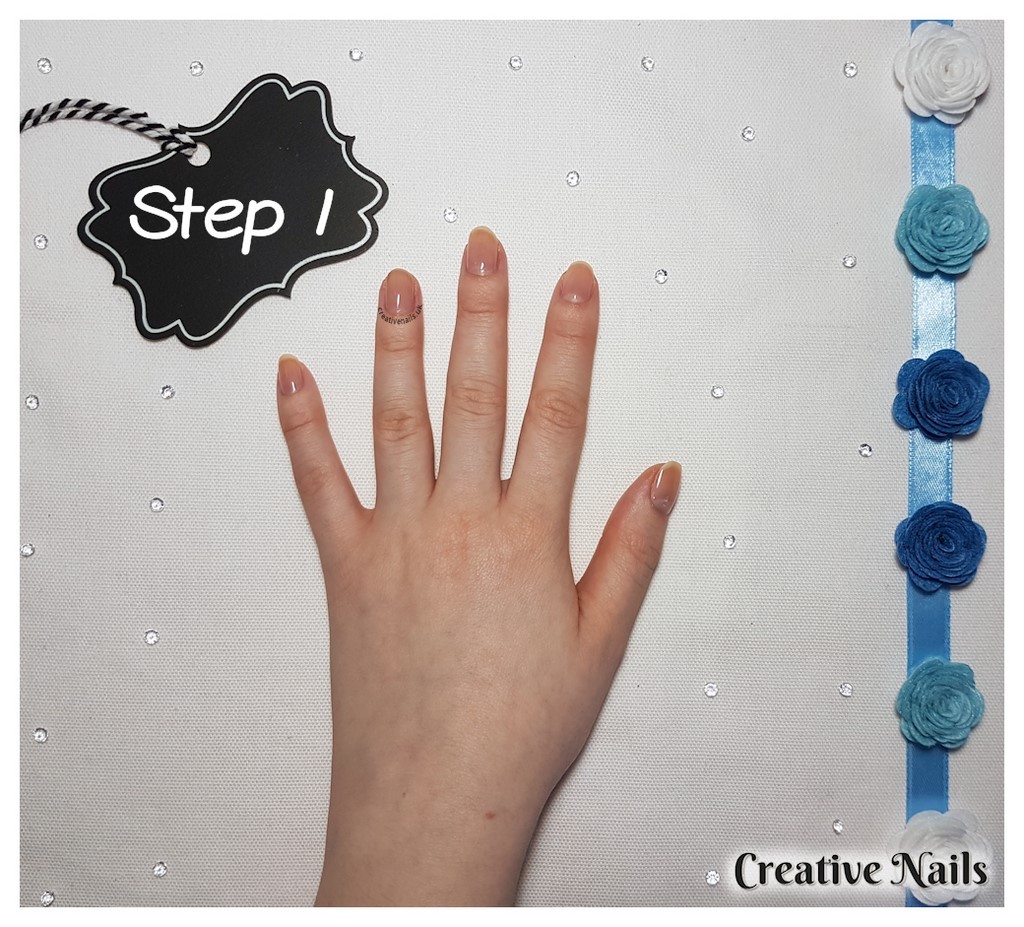
First of all it is important to make sure your nails are clean and ready to be painted before we start, so we need to do a little bit of preparation. If you have nail polish on already, you will need to take it off with some nail polish remover. After this is done, I usually wash my hands just to ensure my nails are completely clean.
Then it’s time to tidy your nails up a little and to shape them to how you want, using with your file. Also, if you want make your nails appear longer – you can push back your cuticles. If you place your hand in some warm water for a few minutes, it will help soften your skin making it easier for you to do this.
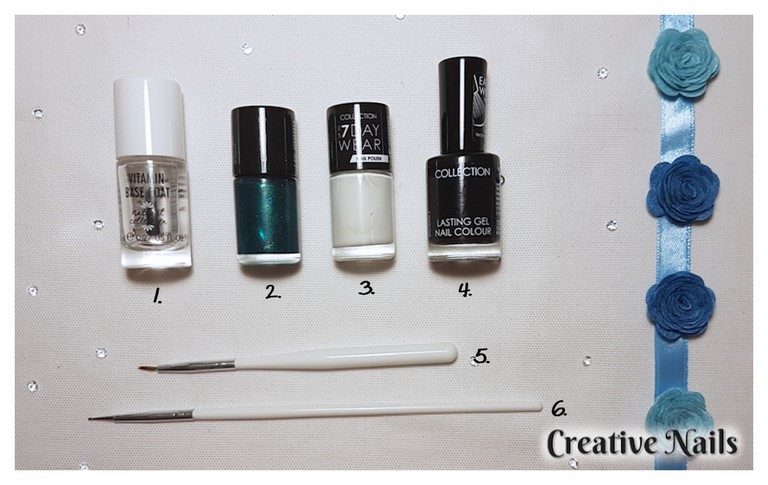
Once you are ready, you should apply a base coat to your nail as this will protect your nails from being stained but also will make applying your nail polish much smoother. We used the Vitamin Base Coat (1) to do this.
step 2
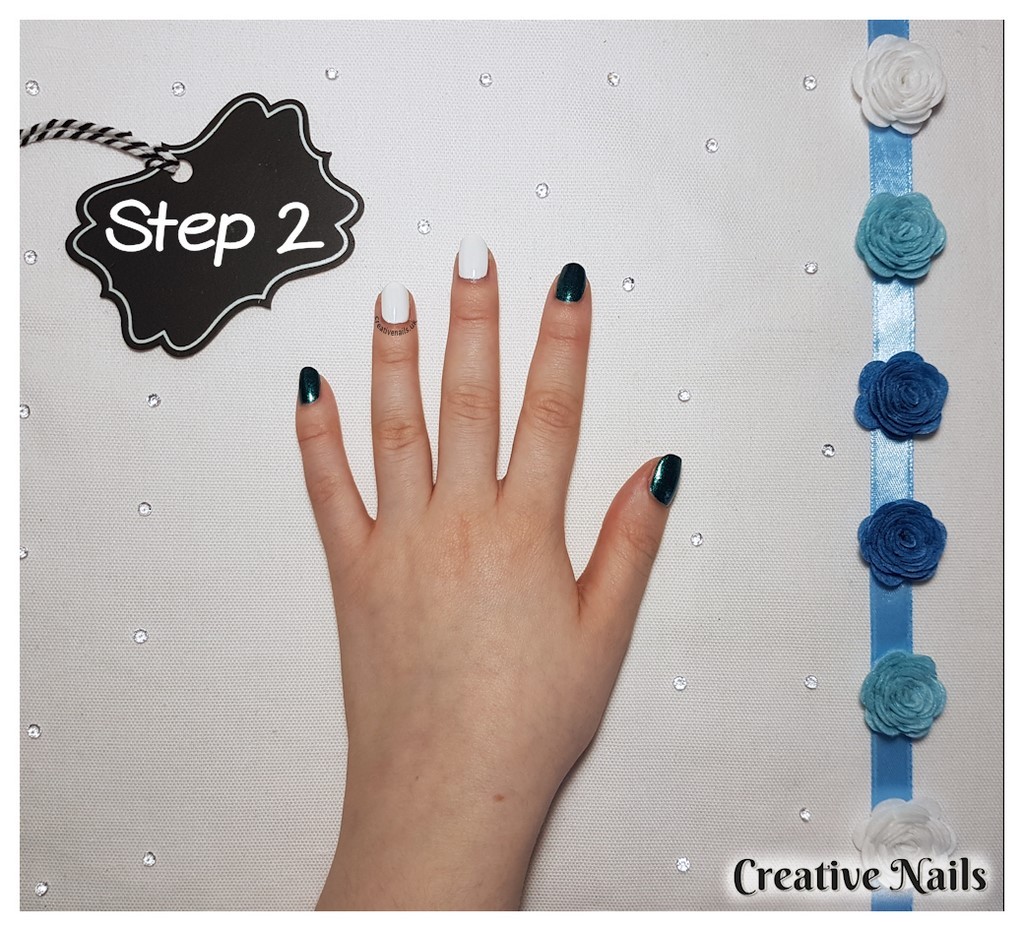
Once your base coat is dry (this shouldn’t take too long), we can start moving on to the more exciting parts – deciding what colour you want your nails to be! For this look, we decided to have the ring finger and the middle finger as the main focus so we painted that nail with the nail polish in the colour White Out (3) and the rest of the nails with the gorgeous sparkly green (2) nail polish. We applied 2 coats of the nail polish as this makes sure the nails are covered well.
We recommend you apply 2 thin coats rather than one thick one as the thicker the coat, the longer it will take to dry.
step 3
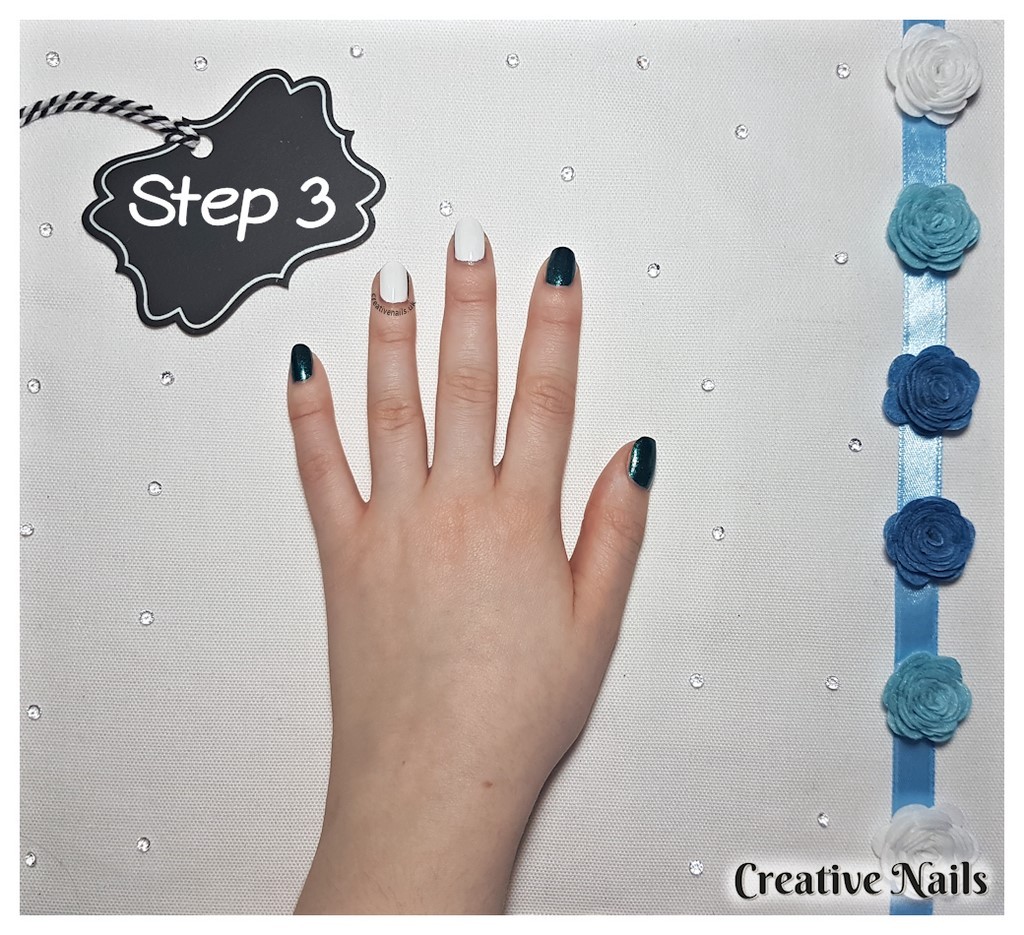
Once the white nail polish is dry, the real fun begins – time to start creating the butterfly. First of all, we have to paint on the black lines for the butterflies body – to do this, we used the dotting tool (6) with the nail polish in the colour Blackjack (4).
We painted these on the nails so it will look like they are joined together when the nails are together (you can see this in the bottom image!).
step 4
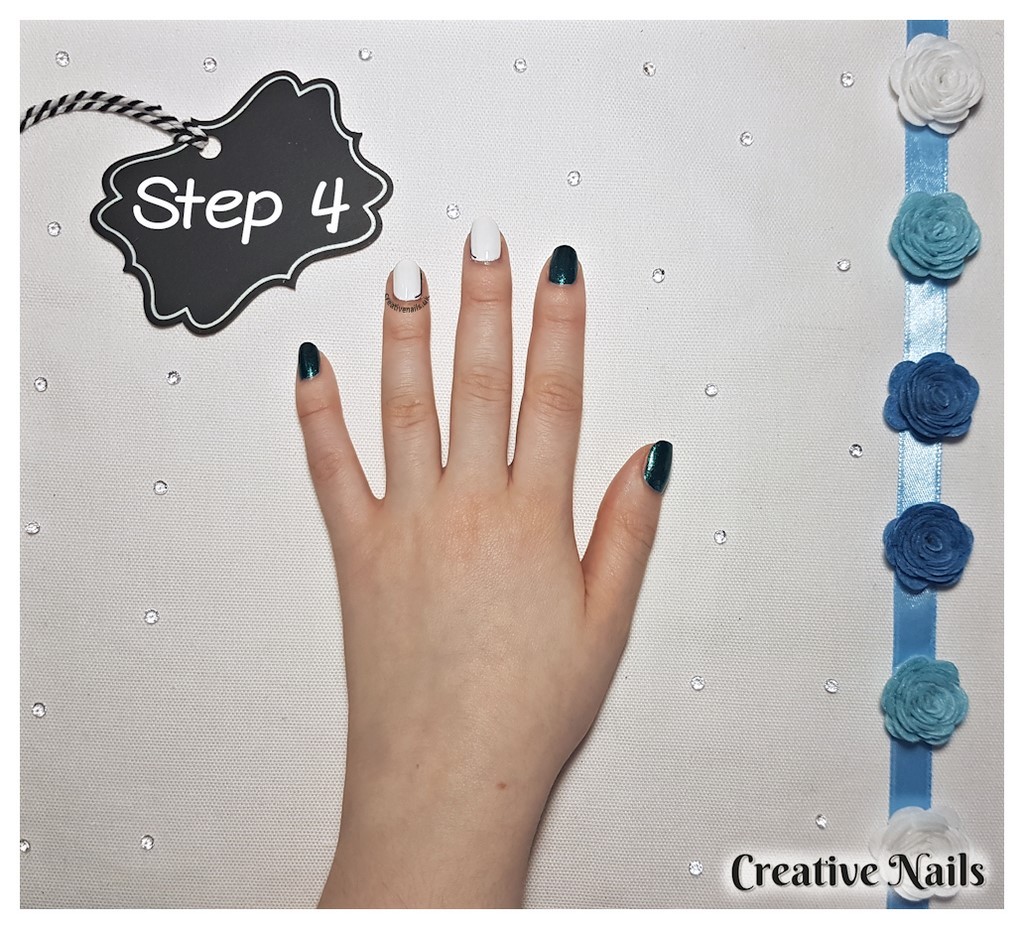
After you have painted on the butterflies body, it’s time to add some antenna’s! We painted these on using the dotting tool (6) with the nail polish in the colour Blackjack (4).
step 5
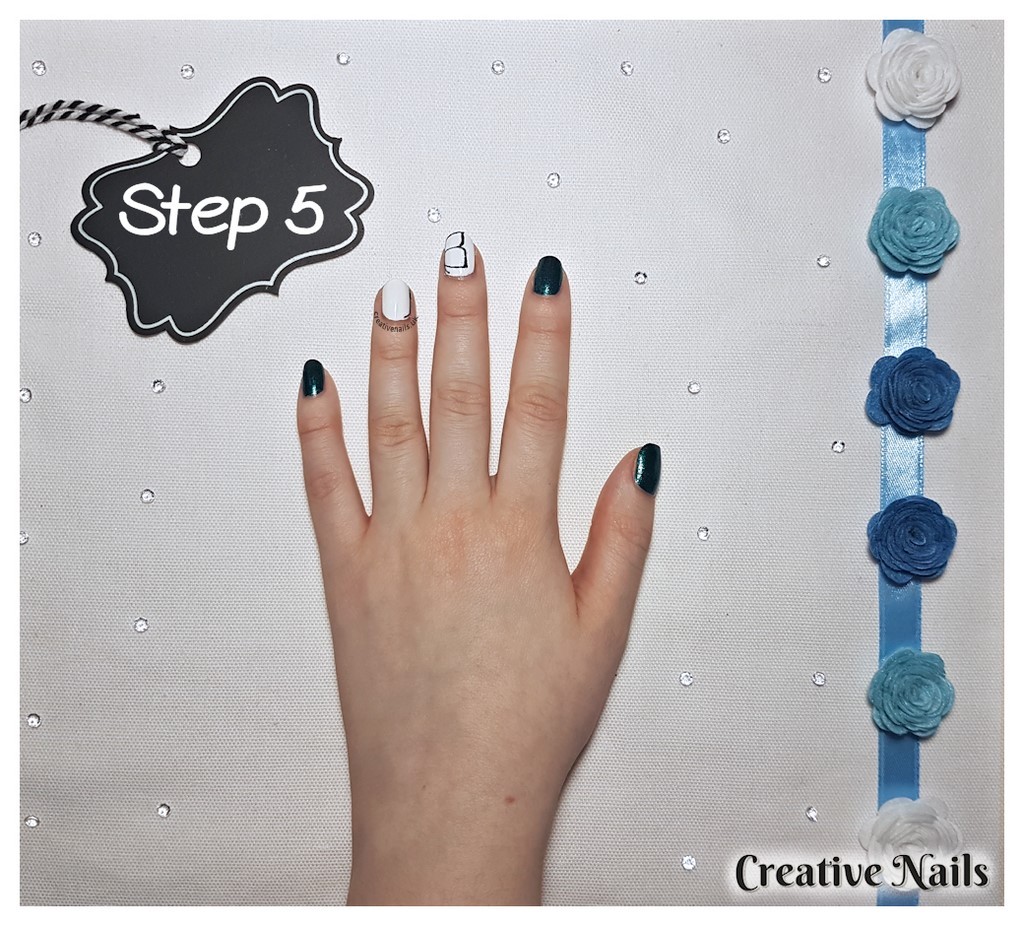
Now the real fun begins – it’s time to start creating the butterflies wings! We decided to shape them as you can see in the picture above, by using the dotting tool (6) and the nail polish in the colour Blackjack (4).
We made a thicker line on the outer side of the wings as you can see above, so we can add some extra detail there later on.
step 6
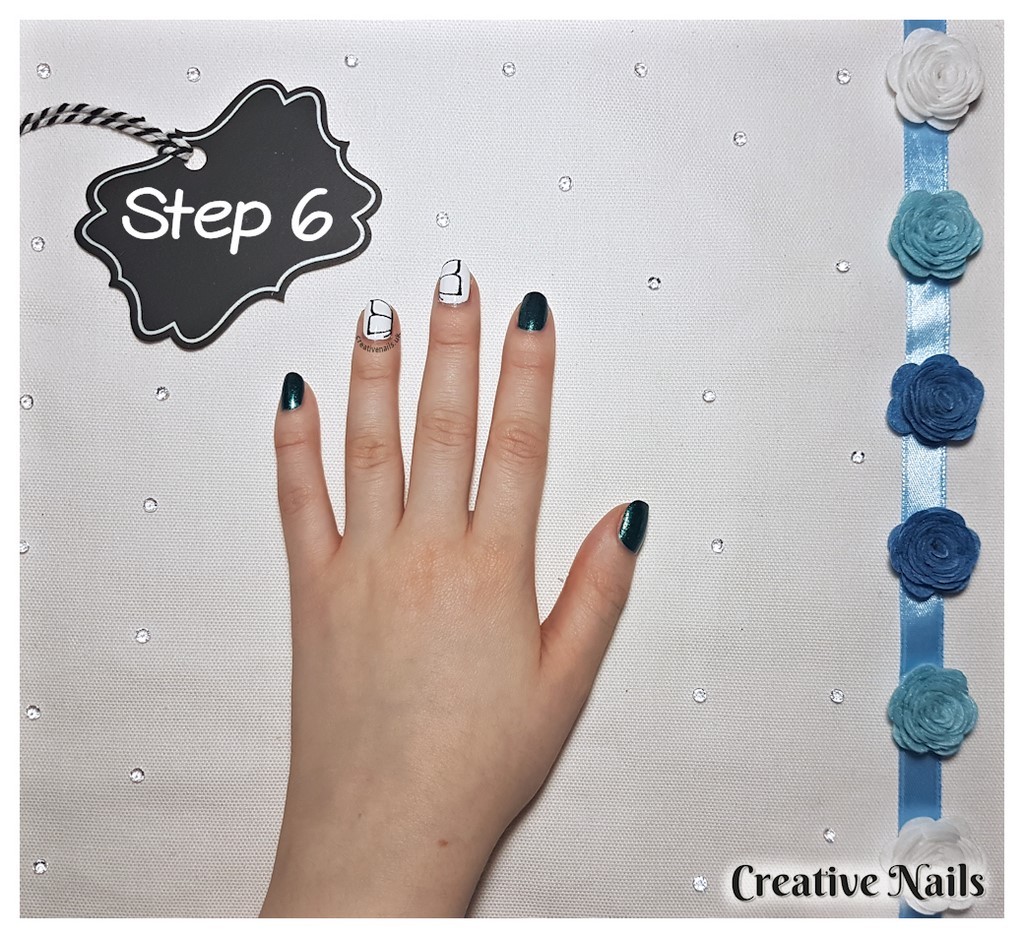
Next, we painted on the other butterfly wing on the ring finger like we did in step 5 so they look the same!
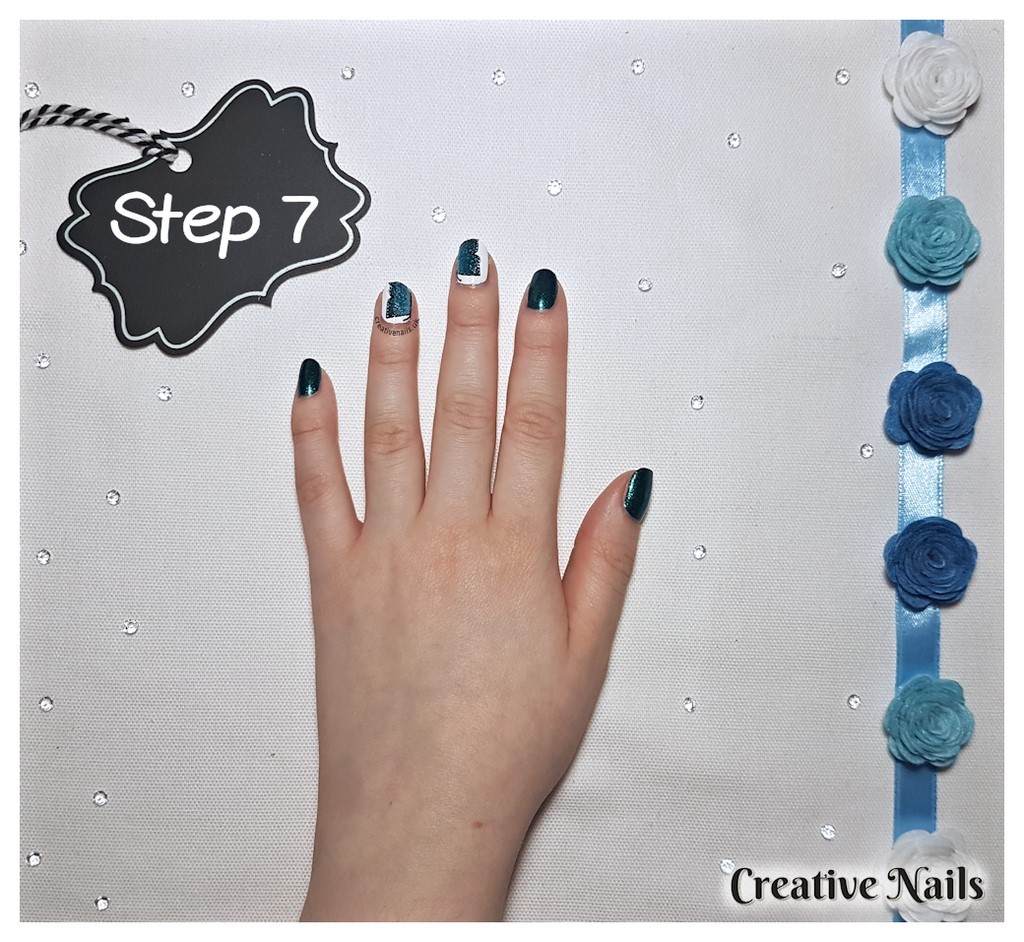
step 7
Now it’s time to add the pretty colour to the wings! To create the effect we did with the nail polish – we started with the lightest shade first. To create this colour, we added some white nail polish (3) to the nail polish in the colour Peacock (2) and mixed it together. Once we were happy with the colour, we painted it on each wing using the small pointed nail brush (5).
Next we created a slightly darker shade by adding a smaller amount of white (3) nail polish compared to last time. Again, once we were happy – we painted it on the wing next to the lighter shade.
We repeated this process once more and added even less of the white (3) nail polish then before to create the darkest tone. Finally, we blended it out to the edge of the wing with the nail polish in the colour Peacock (2).
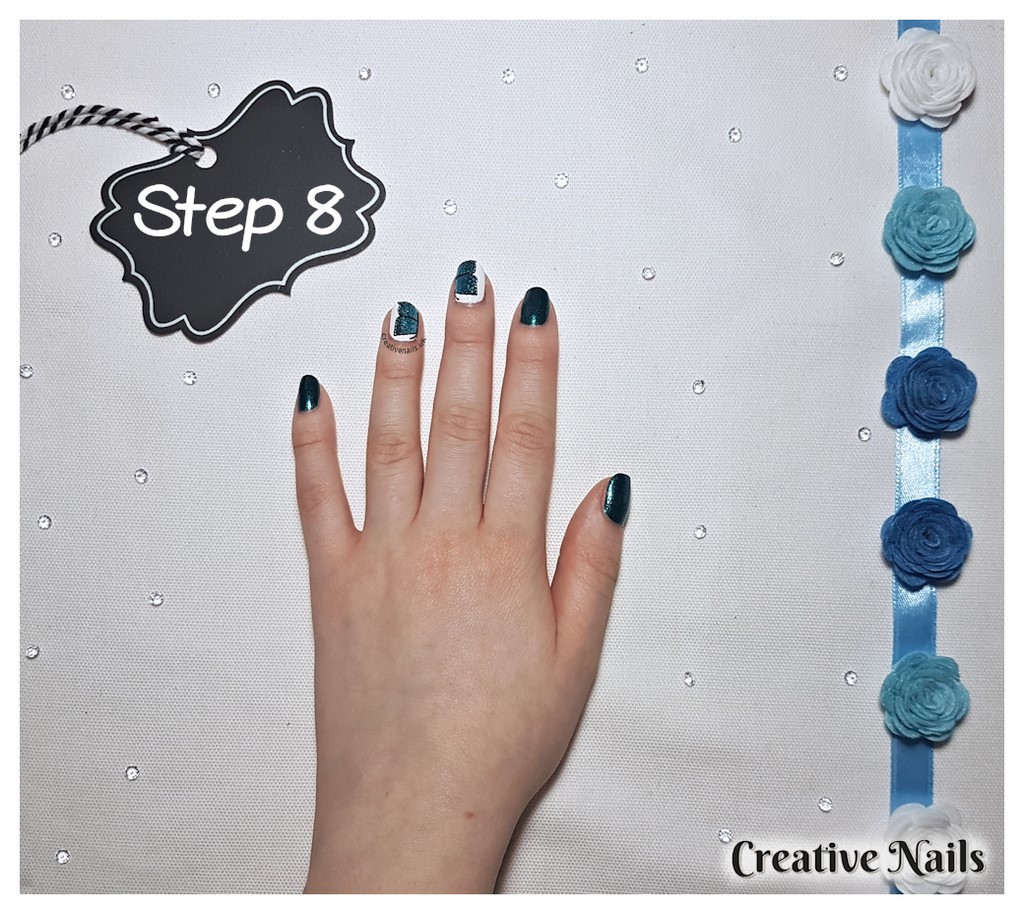
step 8
Once the nail polish is dry after painting on the butterfly wings, it’s time to start adding the detail to the wings! Firstly, we painted on the line to separate the wings by using the dotting tool (6) and the nail polish in the colour Blackjack (4).
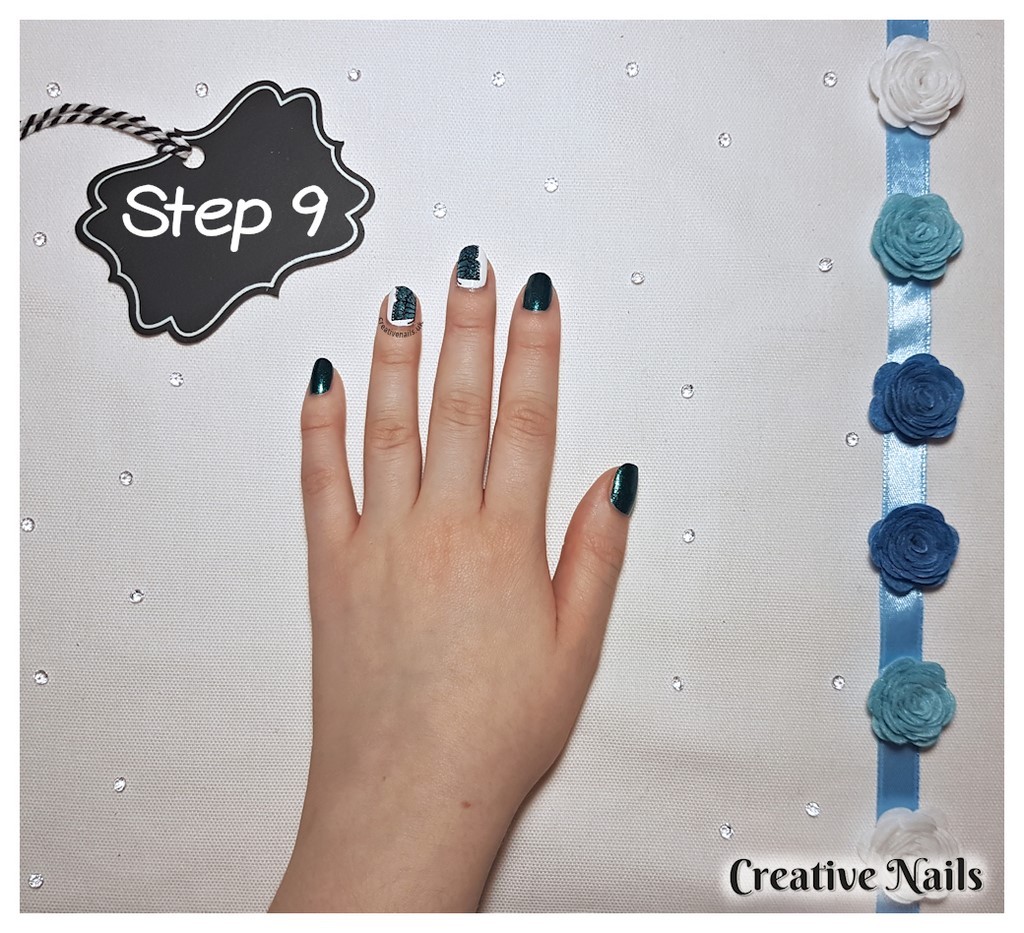
step 9
Next we painted on some thin lines halfway up the nail to create the first bit of detail for the butterfly wing. To do this, we used the dotting tool (6) with the nail polish in the colour Blackjack (4).
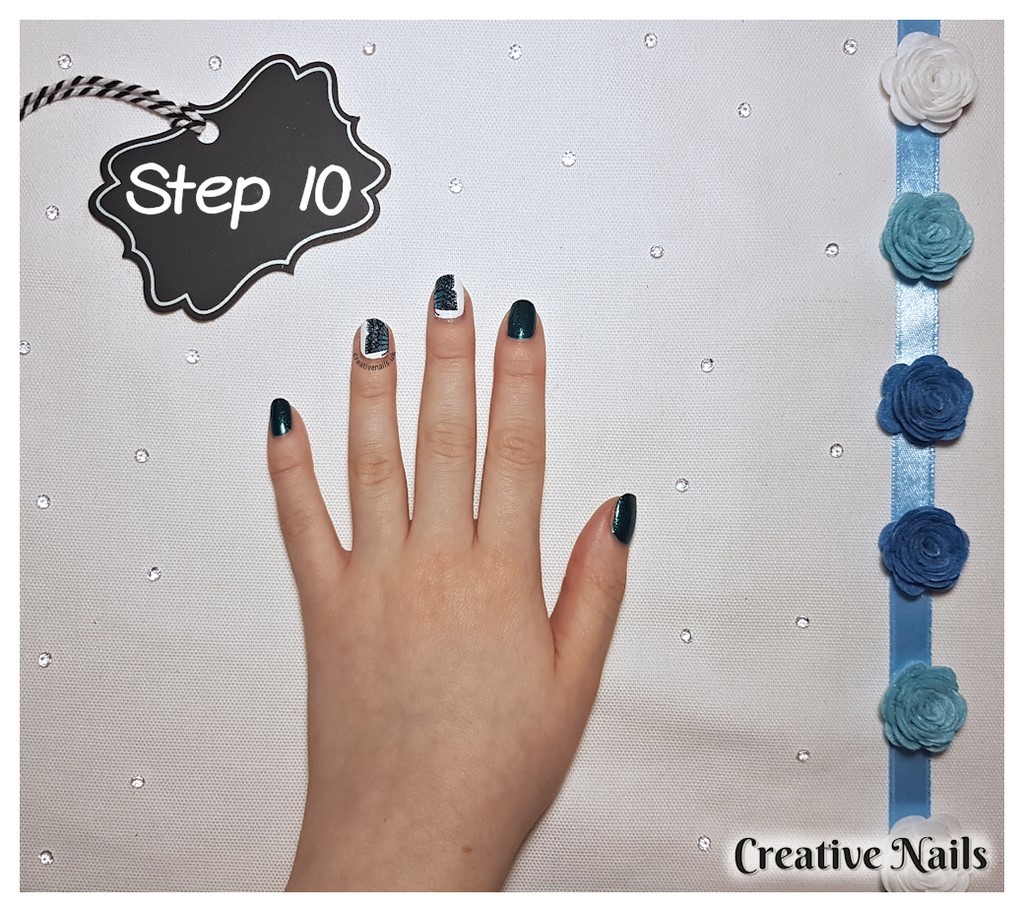
step 10
Now it’s time to add the final touch to the look – adding the last bit of detail to the butterfly wing. We painted on some thin lines in the outer section of the butterfly wing using the dotting tool (6) with the nail polish in the colour Blackjack (4) in the shape of diamonds.
When you are happy – apply a top coat to finish the look off!
And that’s it – a gorgeous butterfly look for your nails that is perfect if you love butterflies, want to add a bit of extra detail to your nails, for everyday wear and if you are going out!
Now it’s your turn! Have you created this look? We’d love to see it – tag us on Twitter and Instagram!
Follow us:
Twitter | Instagram | Facebook
Pinterest | Bloglovin’


