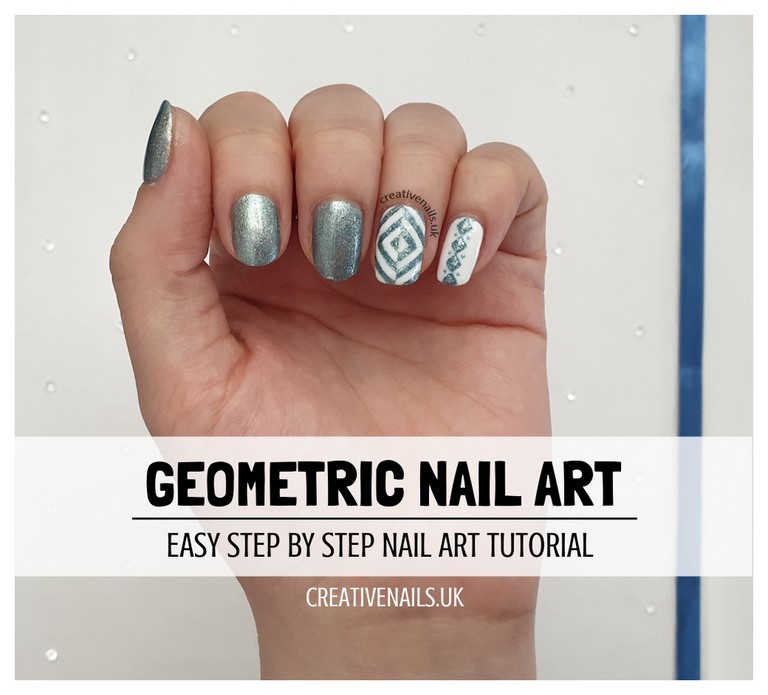
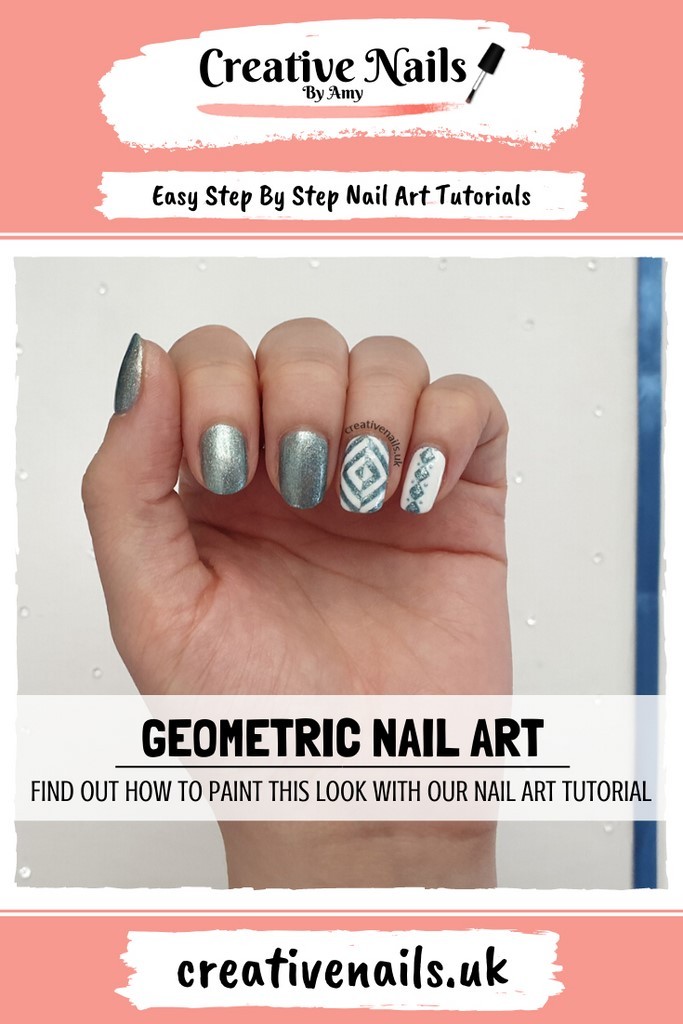
Geometric | Nail Art Tutorial
Would you like this design painted on false nails for you?
If you can’t find this design with our other false nail sets in our shop, please contact me and I will happily sort it out for you!
Now lets show you how we created this geometric nail art!
step 1
First of all it is important to make sure your nails are clean and ready to be painted before we start, so we need to do a little bit of preparation. If you have nail polish on already, you will need to take it off with some nail polish remover. After this is done, I usually wash my hands just to ensure my nails are completely clean.
Then it’s time to tidy your nails up a little and to shape them to how you want, using with your file. Also, if you want make your nails appear longer – you can push back your cuticles. If you place your hand in some warm water for a few minutes, it will help soften your skin making it easier for you to do this.
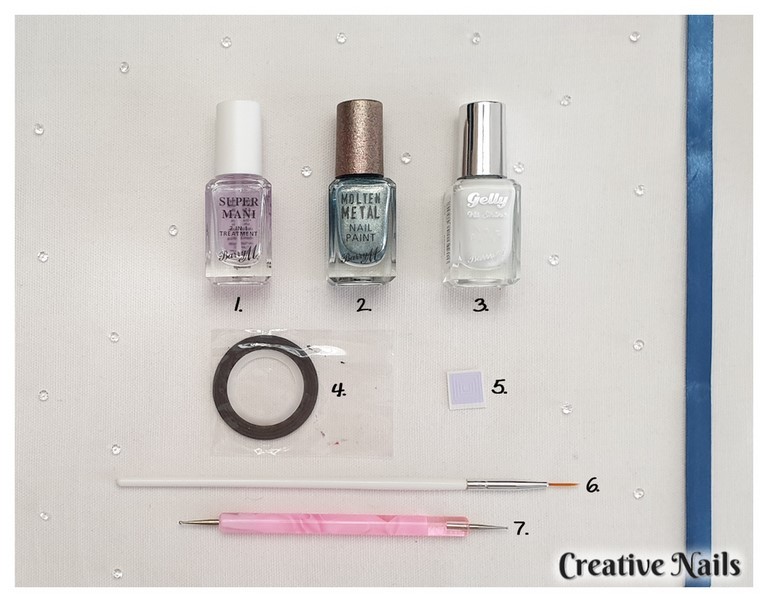
Once you are ready, you should apply a base coat to your nail as this will protect your nails from being stained but also will make applying your nail polish much smoother. We used the Super Mani 7 in 1 Treatment (1) to do this.
step 2
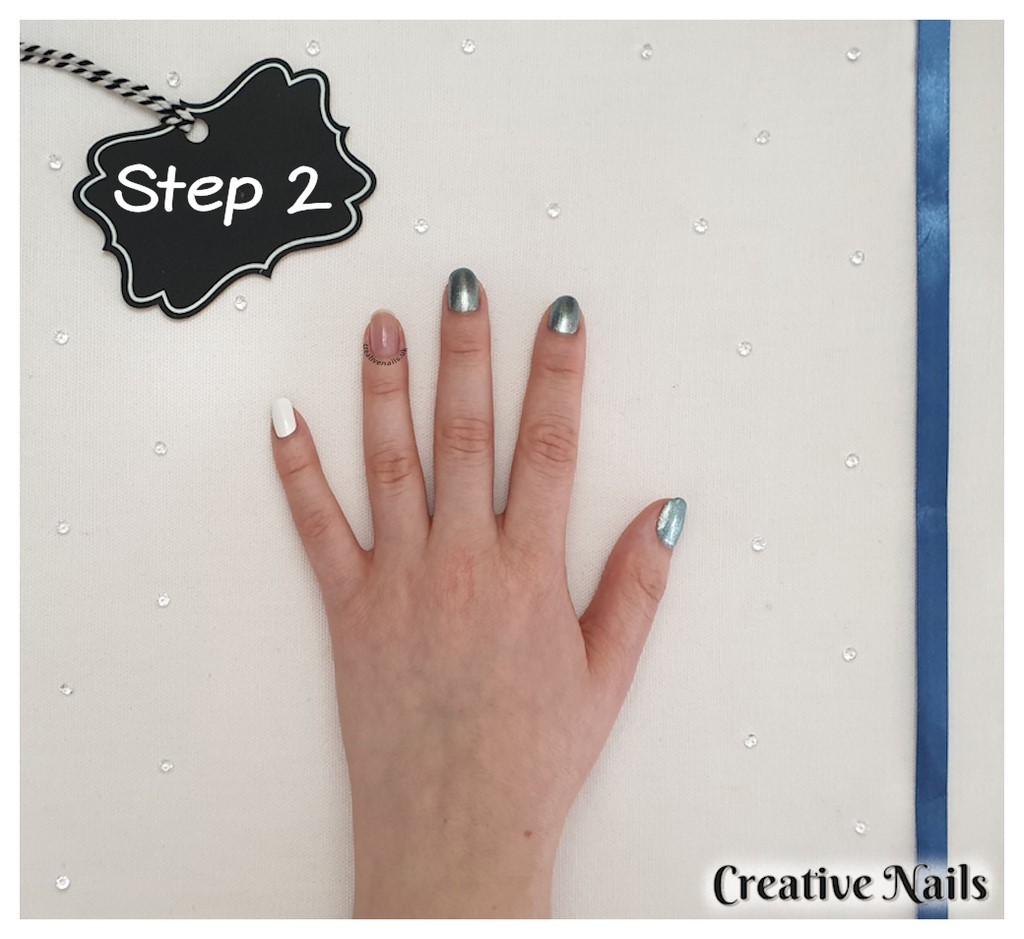
Once your base coat is dry, we can start moving on to the more exciting parts – deciding what colour you want your nails to be! For this look, we painted the middle finger nail, the index finger nail and the thumb nail with the gorgeous nail polish in the colour Blue Glacier (2). *You will want to leave the ring finger nail for the time being!* Next we painted the little finger nail with the nail polish in the colour Cotton (3). We applied 2 coats of the nail polish as this makes sure the nails are covered well.
We recommend you apply two thin coats rather than one thick one as the thicker the coat, the longer it will take to dry.
We recommend you apply two thin coats rather than one thick one as the thicker the coat, the longer it will take to dry.
step 3
Next you want to cut a piece of striping tape (4) and place it straight down the middle of the ring finger nail.
If you don’t have any striping tape or stencils, it’s okay, you can use tape instead! You can see how we used the tape technique in our tutorial for the Stripe and Flower Nail Look.
step 4
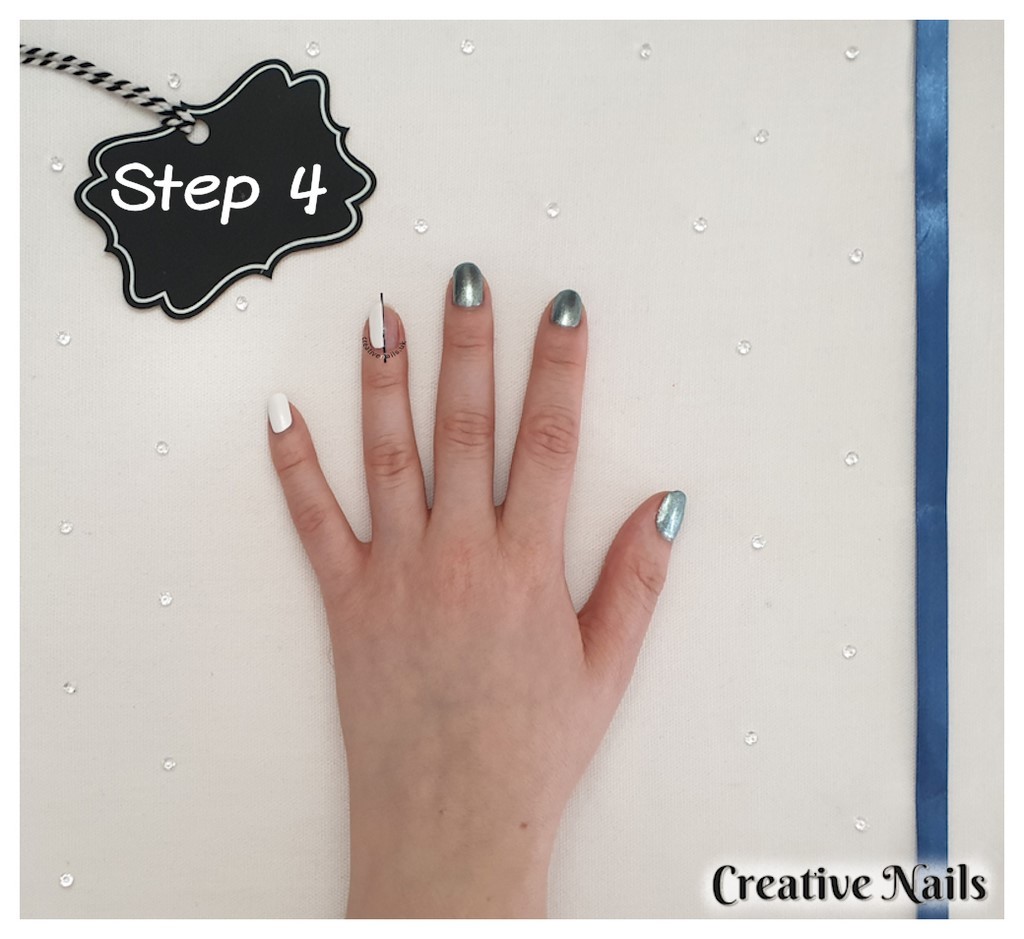
After you have placed the striping tape (4) down the middle of the ring finger nail, it’s time to paint the side closest to the white little finger nail with the nail polish in the colour Cotton (3).
We recommend you apply two thin coats rather than one thick one as the thicker the coat, the longer it will take to dry.
We recommend you apply two thin coats rather than one thick one as the thicker the coat, the longer it will take to dry.
step 5
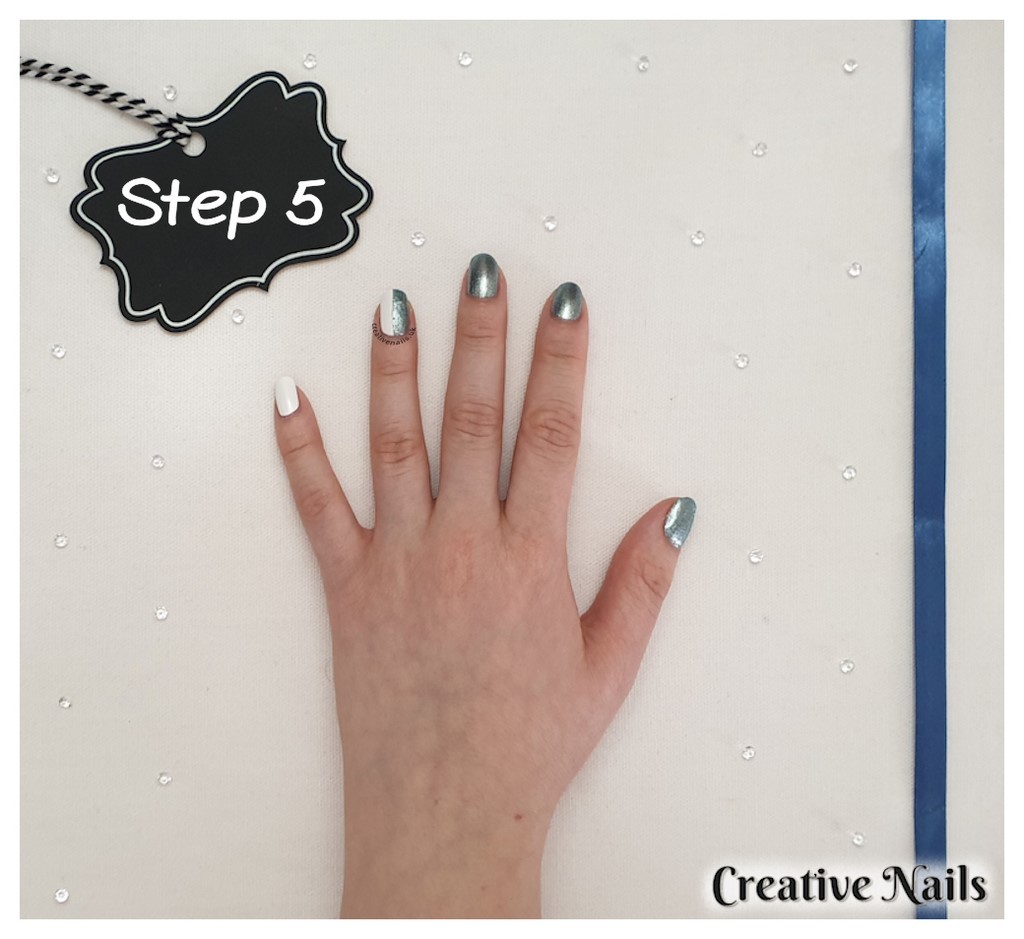
After you have painted on the white nail polish, you will need to gently remove the striping tape and then carefully paint the other side of the nail with the gorgeous nail polish in the colour Blue Glacier (2). If you don’t feel comfortable using the nail polish brush, you can use a smaller brush such as a pointed drawing brush so you have a bit more control.
We recommend you apply two thin coats rather than one thick one as the thicker the coat, the longer it will take to dry.
We recommend you apply two thin coats rather than one thick one as the thicker the coat, the longer it will take to dry.
step 6
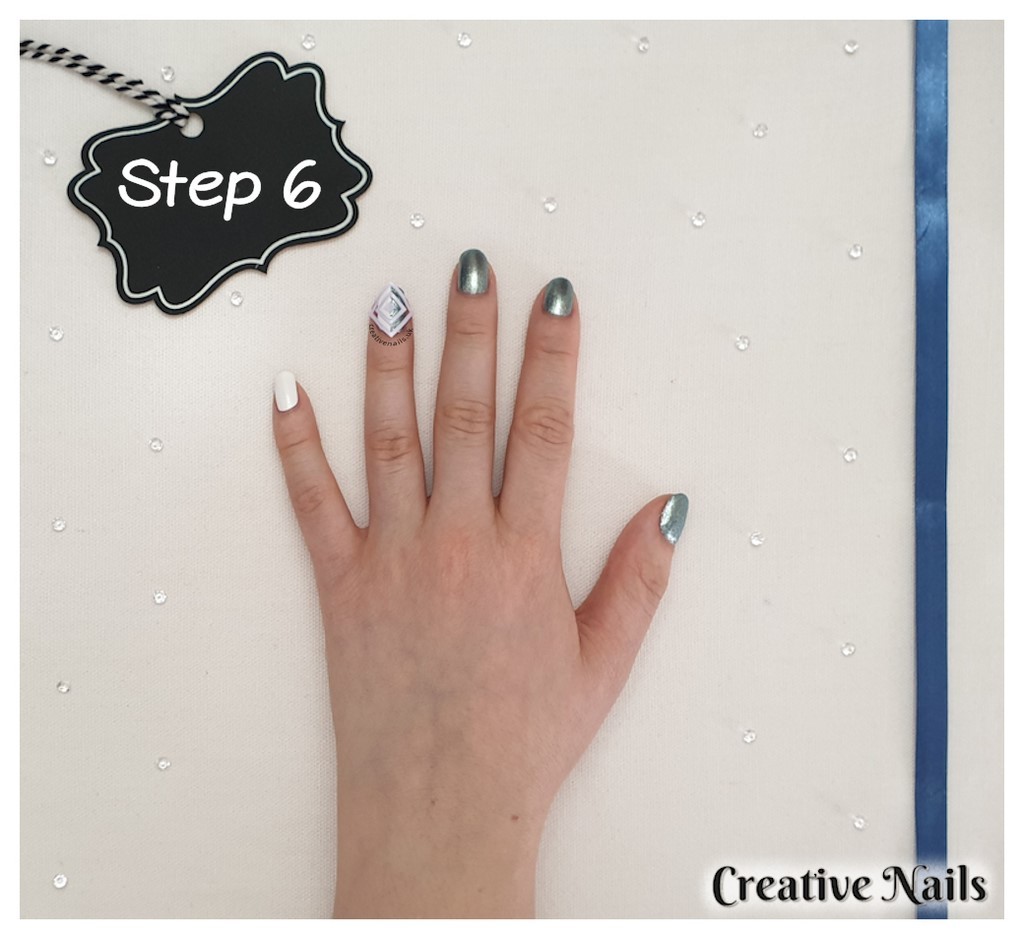
Once the nail polish is dry, it’s time to start creating this geometric nail art! The first thing you will need to do is place the square shaped stencil on the ring finger nail sideways – as you can see in the image above, I placed 2 of the corners in line with the line down the middle.
* It is important you make sure your nail polish is dry before you place it over your nail as this could take your nail polish off!
* It is important you make sure your nail polish is dry before you place it over your nail as this could take your nail polish off!
step 7
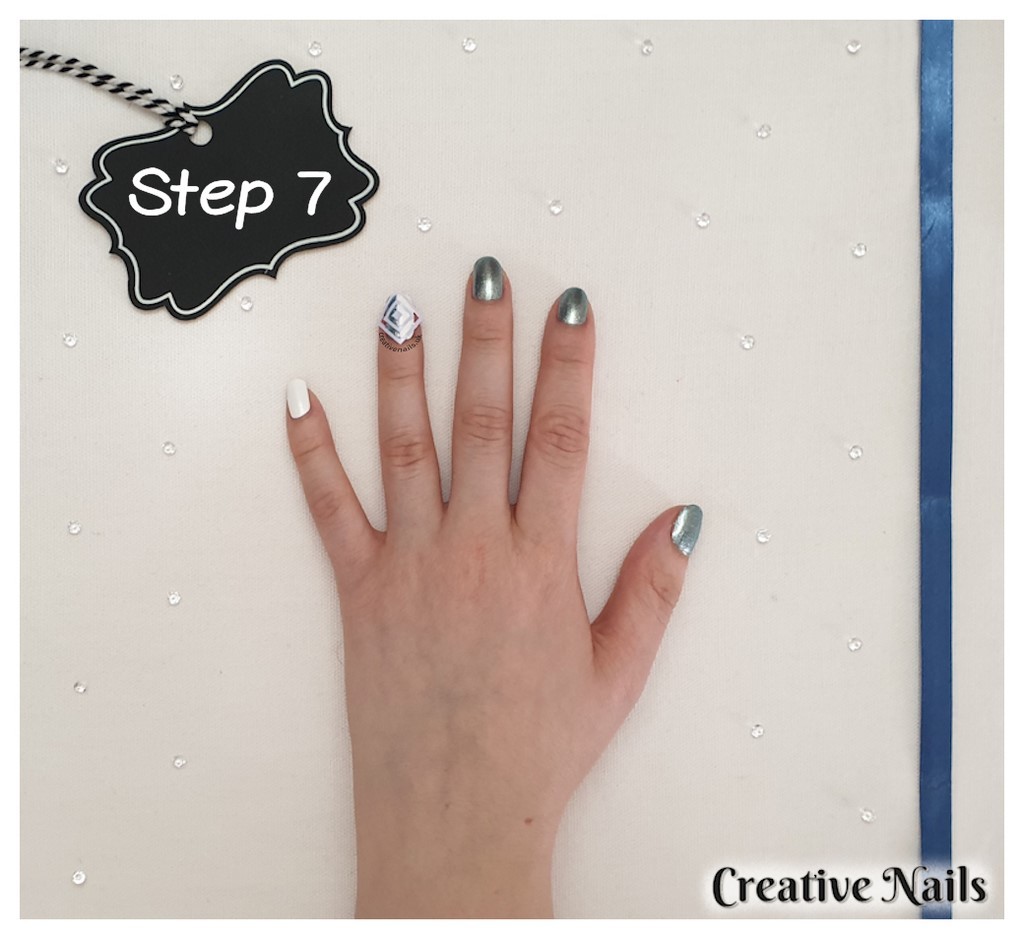
After you have put the stencil on your nail and you are happy with the placement, it’s time to create this gorgeous geometric pattern! You will need to paint on the opposite colour nail polish to what is currently on the nail; if the section is white – then you will need to use the nail polish in the colour Blue Glacier (2), and if the section is blue – then you will need to use the nail polish in the colour Cotton (3).
To make it easier to paint in the small spaces, we used striping brushes (6).
To make it easier to paint in the small spaces, we used striping brushes (6).
step 8
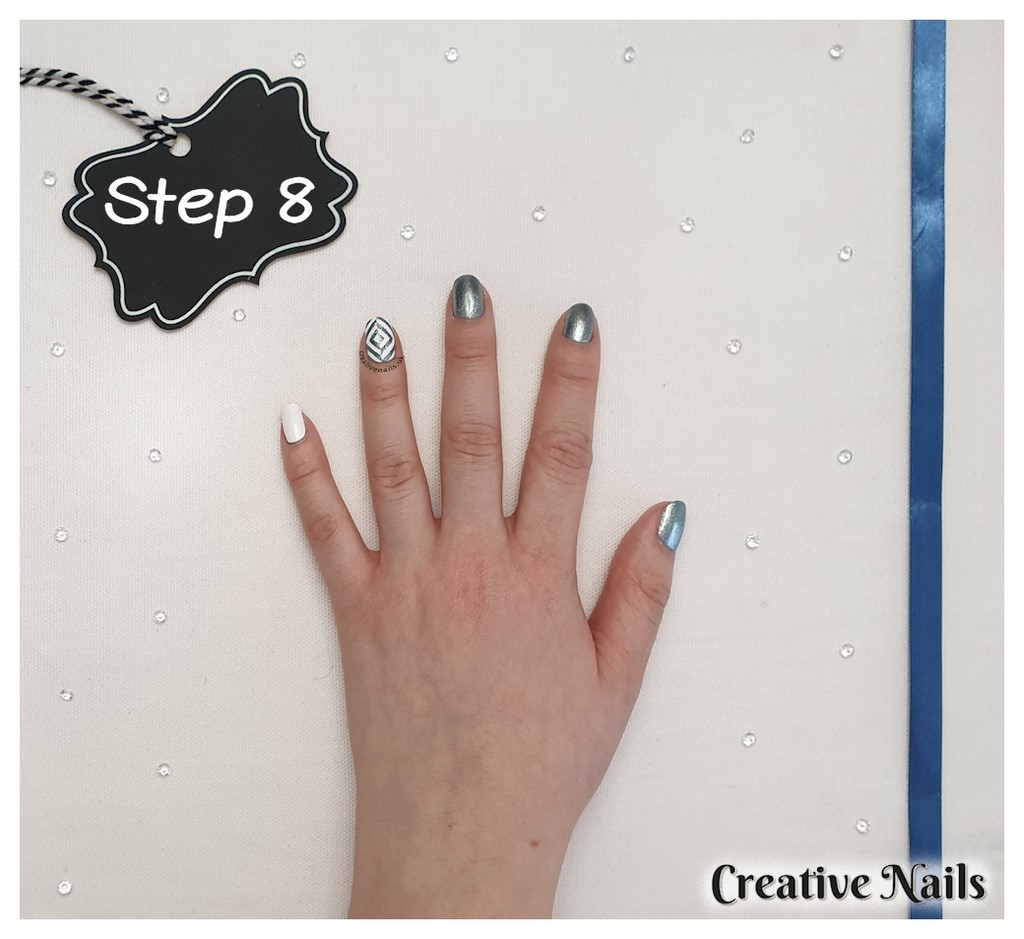
Once you have finished painting on the nail polish, you want to gently remove the stencils. Once you have done that, if needed – you can tidy up any of the lines using the striping brush (6) or any small pointed drawing brushes.
* If you are quick enough, you can remove the stencils as you go so the nail polish doesn’t became too tacky when you go to remove them later on!
* If you are quick enough, you can remove the stencils as you go so the nail polish doesn’t became too tacky when you go to remove them later on!
step 9
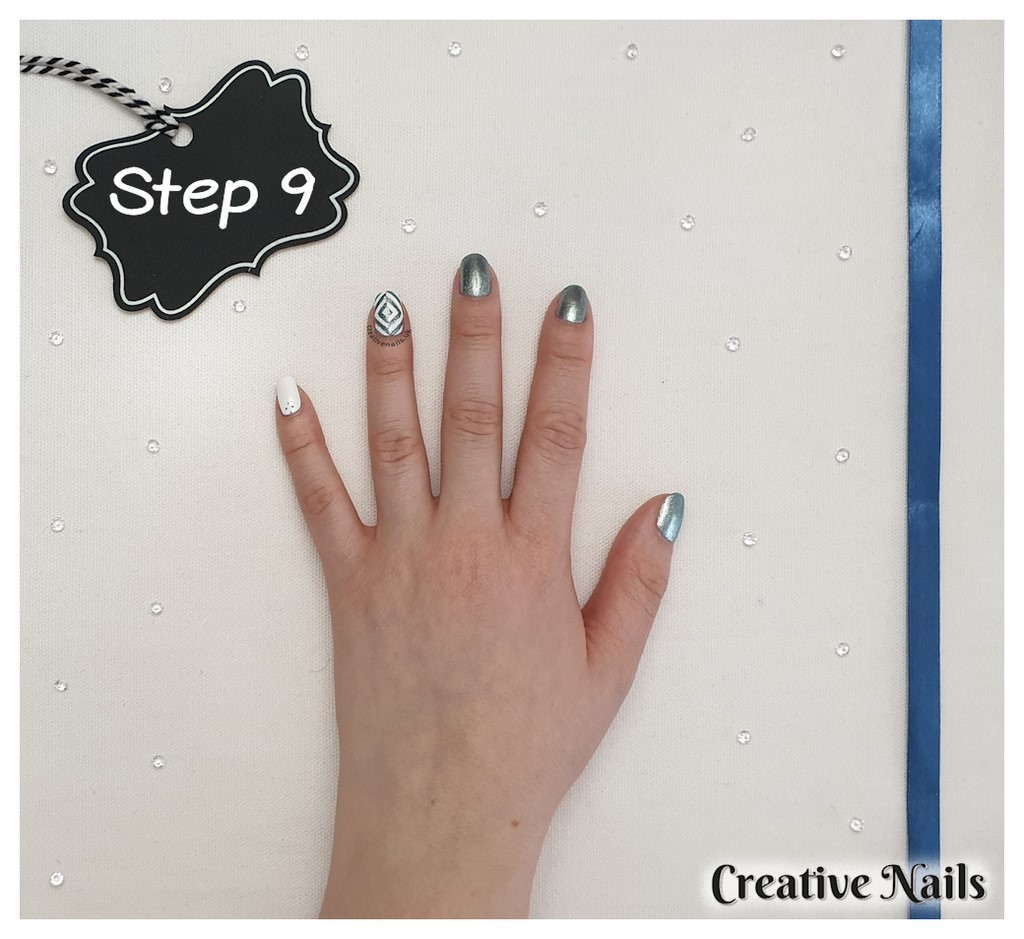
You could leave the nail look there if you wanted to, but we decided to add a little bit extra by painting diamonds on the little finger nail! To make it easier for you to shape them and decide on the size you would like them to be, we painted on 4 small dots in the shape of a diamond using the dotting tool (7) with the nail polish in the colour Blue Glacier (2).
step 10
After you have painted on the 4 dots, you need to join them together to make the diamond shape! To do this, we used the dotting tool (7) with the nail polish in the colour Blue Glacier (2). Additionally, you need to fill in the middle of the diamond with the nail polish in the colour Blue Glacier (2).
step 11
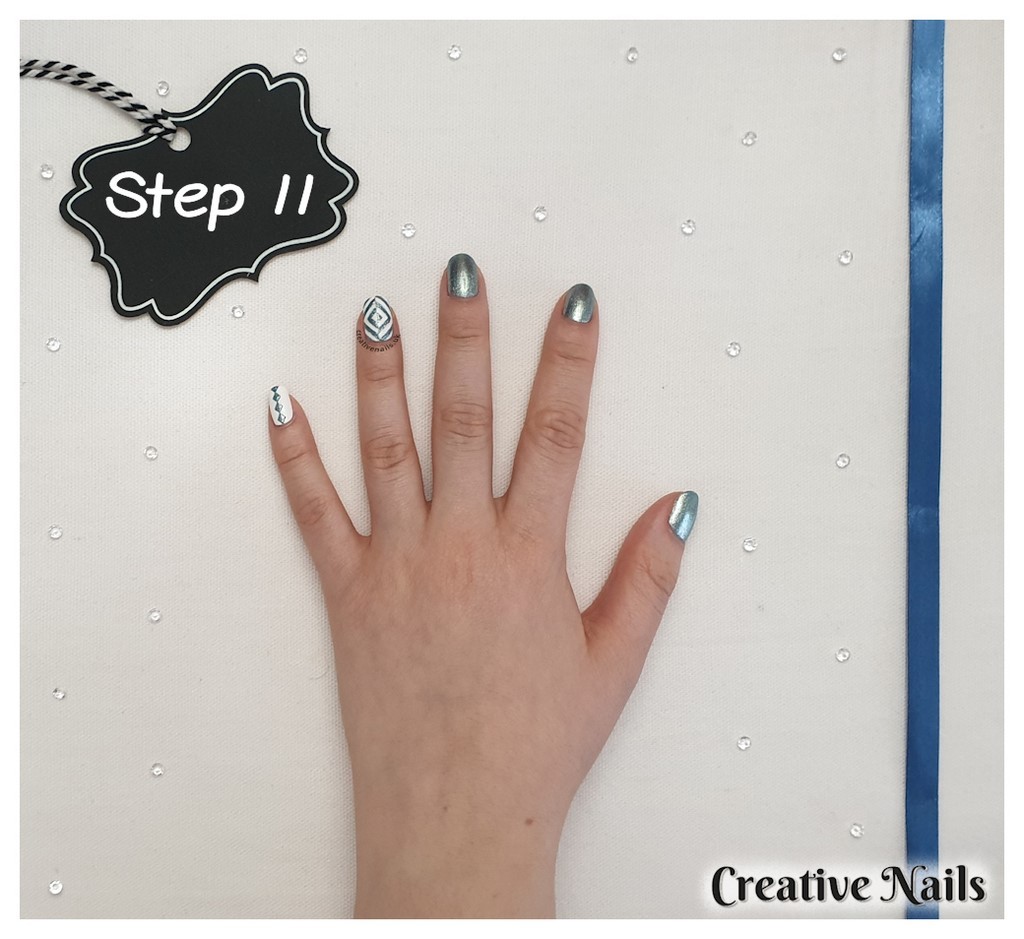
Carry on painting the diamonds down the middle of the little finger nail, using the same technique as shown above!
step 12
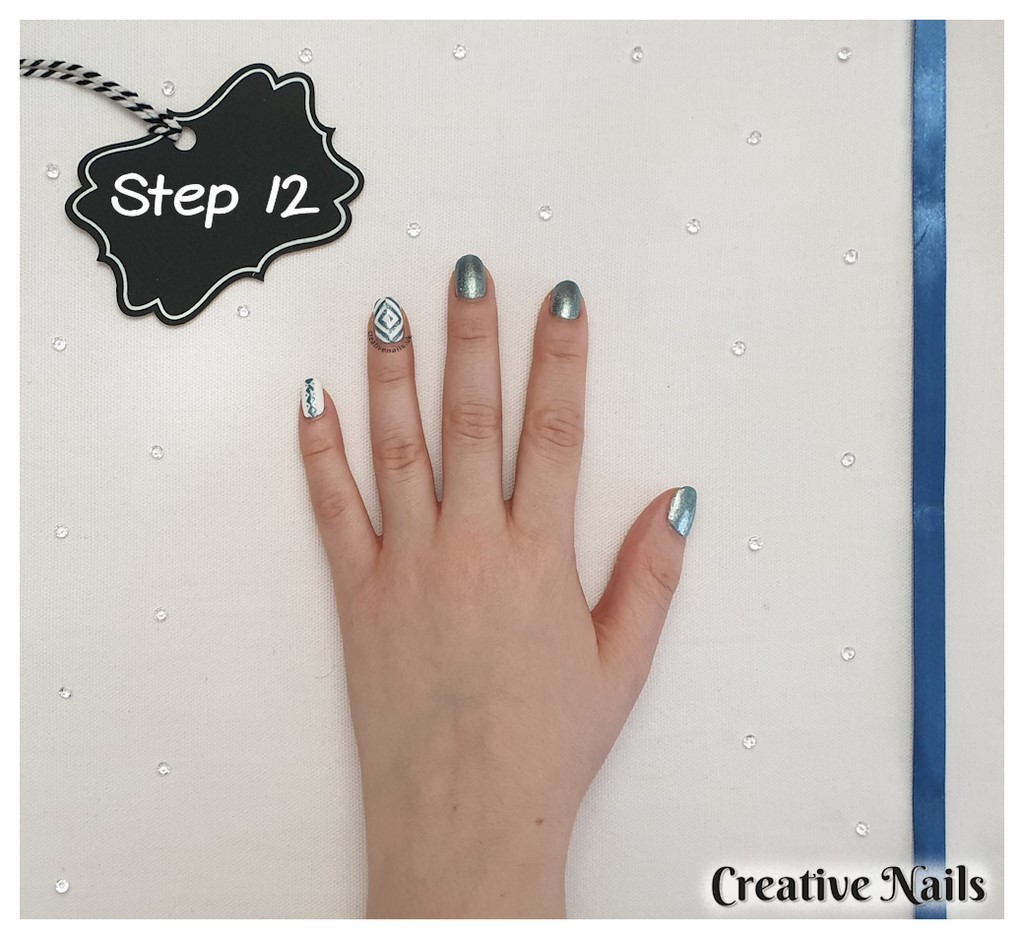
Now it’s time to add the final touches to this geometric nail look! You will need to paint on small dots in the gaps between the diamond using the dotting tool (7) with the nail polish in the colour Blue Glacier (2).
When you are happy – apply a top coat to finish the look off.
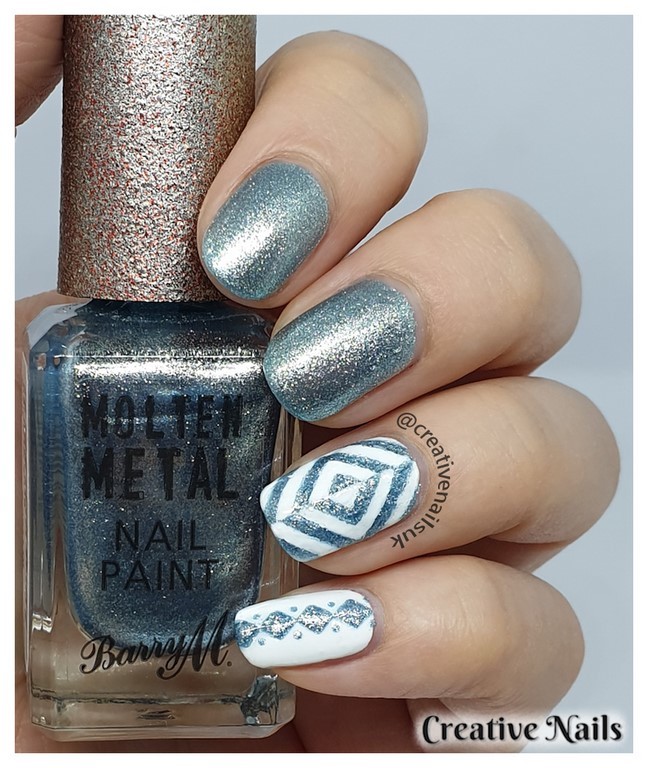
And that’s how we created this geometric nail look! It’s a gorgeous nail look for your nails that is perfect for everyday wear and parties!
Now it’s your turn! Have you created this look? We’d love to see it – tag us on Twitter and Instagram!
Follow us:
Twitter | Instagram | Facebook
Pinterest | Bloglovin’


